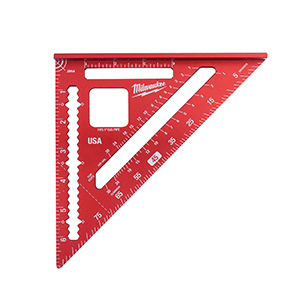





Milwaukee Guides and Measures
Before you cut timber or fix a frame, Milwaukee measuring tools help you check lengths, levels and square.
Milwaukee guides and measures cover setting out, checking and marking for chippies, fitters and general builders. Match the tape graduations, level length and square size to your work, then choose the kit you need.
What Are Milwaukee Measuring Tools Used For?
- Measure stud lengths and sheet materials during first fix with a Milwaukee tape measure, checking the blade scale before transferring dimensions to your cut list.
- Check door linings, kitchen units and studwork for level and plumb with a Milwaukee spirit level that sits properly across the workpiece.
- Mark square cut lines across joists and framing timber with Milwaukee squares, keeping the stock firmly against a straight reference edge.
- Transfer fixing positions onto timber, plasterboard and other suitable surfaces with Milwaukee marking tools, using a clear, narrow mark rather than a broad line that leaves room for error.
Choosing the Right Milwaukee Measuring Tools
Buy for the measurement you need to trust, not simply the biggest tape or longest level.
1. Tape Length, Scale and Unsupported Reach
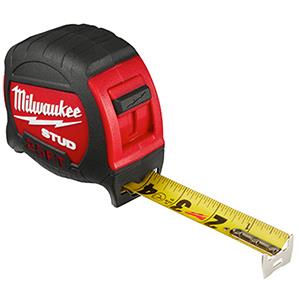
If you mainly measure cabinets and smaller rooms, a shorter tape keeps pocket bulk down. For framing and longer room dimensions, choose enough blade length and check the stated unsupported reach. Pick metric-only or dual-scale markings deliberately; crowded graduations are no help when you need a quick, precise reading.
2. Level Length and Working Surface
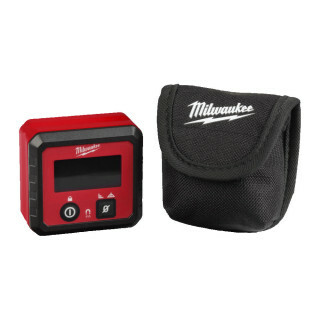
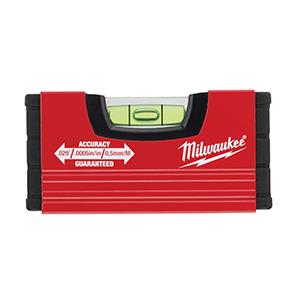
Use a longer level across door linings and studwork to check over a useful span. Keep a compact level for tight cupboards and short fittings. If you work on steel, a magnetic model can free a hand, but check that the contact surface is clean before trusting the reading.
3. Fixed Square or Adjustable Square
For repeated framing marks, choose a fixed square that registers securely against the timber edge. If you also need to transfer offsets or check depths, a combination square gives you an adjustable rule and stock. Check the size and scale format before ordering.
4. Accuracy for the Finished Job
For close-fitting joinery, check the individual tool's stated accuracy rather than relying on the brand name. Use a fine marking method and one consistent reference edge; an accurate tape cannot correct a thick pencil line or a bowed board.
Who Uses Milwaukee Measuring Tools?
Chippies use tapes and squares to set out studwork, roofing timber and sheet cuts. Kitchen fitters and joiners use levels and marking tools to position cabinets, check door linings and transfer dimensions accurately. Brickies and general builders need longer levels for checking courses and openings, while maintenance teams keep compact measuring kit handy for repairs in occupied buildings.
Accessories to Keep Your Measuring Kit Working
Protect the measuring surfaces and keep suitable marking supplies with the tools.
1. Protective Level Bags
A correctly sized level bag keeps the frame and vials away from loose fixings and other tools in the van. It also stops a long level being left loose beneath heavier kit.
2. Replacement Leads and Marking Refills
For refillable marking tools, carry the correct lead size and a grade suited to the surface. Spare leads prevent a broken point stopping your setting out halfway through a run of timber.
Choose the Right Milwaukee Measuring Tools for the Job
Match the tool to the check you need to make.
| Your Job | Tool Type | Key Features |
|---|---|---|
| Measuring rooms and first-fix timber | Tape measure | Sufficient blade length, readable graduations and suitable unsupported reach. |
| Checking door linings and studwork | Long spirit level | A straight, undamaged frame and clearly readable level and plumb vials. |
| Levelling fittings inside cupboards | Compact spirit level | A body short enough to sit properly on the fitting; magnetic holding where useful. |
| Marking repeated cuts on framing timber | Fixed square | A secure reference edge and a size suited to the timber section. |
| Transferring offsets and checking shoulders | Combination square | An adjustable stock, clear rule graduations and a firm locking mechanism. |
Common Buying and Usage Mistakes
- Buying the wrong scale format makes reading slower and increases the chance of mistakes. Check whether the individual tape or rule is metric-only or metric and imperial.
- Trying to check a long frame with a very short level can miss bowing between checking points. Choose a level that spans a useful length of the work.
- Treating normal tape-hook movement as damage can lead to unnecessary replacement. The hook moves to compensate for its thickness on internal and external measurements; check for bending or excessive play instead.
- Marking from a rough or bowed edge transfers that error into every cut. Establish a straight reference edge before using a square or transferring dimensions.
Tape Measures vs Spirit Levels vs Squares
Tape Measures for Length and Distance
Choose a tape for room dimensions, material lengths and fixing centres. It reaches further than a square, but blade sag and an angled pull can affect the reading. It will not tell you whether the work is level or square.
Spirit Levels for Level and Plumb
Choose a spirit level when positioning frames, cabinets and fittings. It checks orientation against gravity rather than measuring length. A longer frame covers more of the work, but needs enough space and sound contact points.
Squares for Angles and Repeat Marks
Choose a square for checking right angles and marking cuts from an edge. A combination square also transfers offsets within its adjustment range. Neither replaces a tape for long measurements or a spirit level for checking plumb.
Maintenance and Care
Clean Before Packing Away
Wipe dust, wet plaster and grit from blades, level faces and square stocks. Dirt trapped against a reference surface can throw out the next reading.
Control Tape Retraction
Guide the blade back rather than letting it slam into the case. Dry a damp blade before storage and stop using a tape with a kinked, split or dangerously sharp blade.
Check After a Drop
Check a level by reversing it on the same stable surface and comparing readings, following its instructions. Check a square with a reversed line test from a straight edge. Investigate any disagreement before marking finished work.
Store Without Loads on Top
Keep levels and squares dry and protected from heavy tools in transit. A bent frame, damaged stock or loose vial needs assessment or replacement, not a guess at the correction.
Shop the Milwaukee Measuring Tools Range at ITS
ITS stocks the full Milwaukee guides and measures range, covering tape measures, spirit levels, squares and marking tools for setting out and checking work. Stock is held in our own warehouse, with in-stock lines ready for next-day delivery, subject to order cut-off and delivery location.
Milwaukee Measuring Tools FAQs
What measuring tools does Milwaukee make?
Milwaukee makes tape measures, spirit levels, squares and other measuring and setting-out equipment, alongside marking tools. For a basic carpentry kit, start with a tape, a suitable square and a level long enough for the work you check most often.
Are Milwaukee tape measures accurate?
Check the accuracy class stated for the individual model; not every tape has the same specification. A sound hook, straight blade and correct measuring technique matter too. Keep the blade aligned with the measurement and check it against a trusted reference if it has taken a knock.
Does Milwaukee make spirit levels?
Yes. Milwaukee makes compact and longer spirit levels, including magnetic options. Choose the length for the workpiece and check the individual model's accuracy specification. A compact level suits restricted spaces, while a longer frame is more useful across door linings and studwork.
What is the best Milwaukee measuring tool for carpenters?
There is no single tool that covers the job. A tape handles lengths, a square handles cut lines and right-angle checks, and a spirit level checks level and plumb. For first-fix work, prioritise a readable tape and a square sized to your usual timber sections.
Are Milwaukee measuring tools covered by warranty?
Warranty cover depends on the tool and the applicable Milwaukee terms. Check the product's cover, exclusions and any registration requirements before buying, and keep your proof of purchase. Do not assume a damaged blade, normal wear or accidental damage will be covered.
Are Milwaukee measuring tools accurate enough for joinery?
Suitable models can be used for joinery, but match the stated accuracy to the tolerance of the work. For tight-fitting joints, check the square, use a fine marking method and work from consistent reference faces. A general-purpose tape is not a substitute for precision measuring equipment where closer tolerances are required.
Does Milwaukee make a combination square?
Yes. Milwaukee makes combination squares with an adjustable stock and rule for checking right angles, transferring offsets and measuring depths. Check the listed rule length and graduations, and make sure the stock locks firmly before relying on repeated marks.
Are Milwaukee measuring tools metric and imperial?
Milwaukee offers metric-only and metric and imperial options across relevant measuring tools, but the scale format varies by model. Check the exact product description before ordering, particularly if you want an uncluttered metric blade or need imperial markings for existing work.