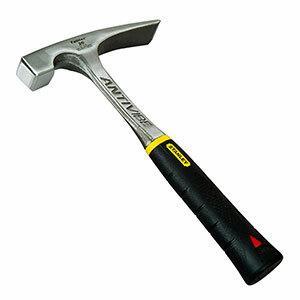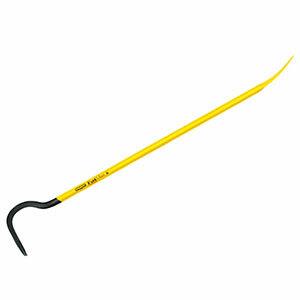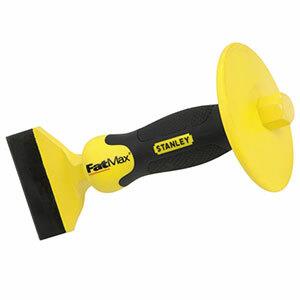




Stanley Demolition and Construction Tools
Stanley demolition tools are built for stripping out, prising apart, and shifting stubborn materials without wrecking your hands or wasting time.
When you're ripping out old joinery, lifting floorboards, knocking back masonry or pulling fixings that do not want to move, this is the sort of kit you reach for first. Stanley demolition tools cover the site basics properly, from a Stanley wrecking bar and Stanley crowbar to bolsters, cold chisels and nail pullers that stand up to hard use. Pick the length, edge and strike face to suit the job, and get tools that pry cleanly, hit true and take the abuse.
What Are Stanley Demolition Tools Used For?
- Stripping out old skirting, architrave and nailed timber is where a Stanley wrecking bar earns its keep, giving you the leverage to lift sections cleanly without smashing everything around it.
- Breaking back plaster, brick edges and small areas of blockwork is easier with a Stanley bolster or Stanley cold chisel when you need control rather than dragging out a breaker for a quick job.
- Pulling stubborn nails from reclaimed timber, shuttering and first fix rip-out work is exactly what a Stanley nail puller or pry bar is for, especially when fixings are buried or bent over.
- Opening up crates, pallets and packing on site is a simple job for a Stanley crowbar, saving time when deliveries need breaking down fast without wrecking the contents.
- Freeing seized materials, lifting floorboards and separating joined sections during refurb work suits Stanley demolition bar tools because they give you a solid edge and proper leverage where a claw hammer just is not enough.
Choosing the Right Stanley Demolition Tools
Sorting the right tool is simple: match the shape and length to what you are actually pulling, lifting or breaking, not just what looks toughest.
1. Bar Length and Leverage
If you are doing heavier strip-out, go longer because the extra leverage saves your back and shifts stubborn fixings faster. If you are working in cupboards, between joists or tight corners, a shorter Stanley demolition bar is easier to place and control.
2. Wrecking Bar vs Pry Bar
If the job is rough rip-out with buried nails and thicker timber, a Stanley wrecking bar is usually the better shout. If you need more controlled lifting, easing and separating without smashing the surrounding finish, a slimmer Stanley pry bar makes more sense.
3. Chisel or Bolster for Masonry Work
Use a Stanley cold chisel for narrower, more precise cuts in metal or masonry edges. Go for a Stanley bolster when you need to take off wider sections of plaster or brick face and want a broader cutting edge that covers more in one hit.
4. Nail Pulling Shape
If you are mostly pulling exposed fixings from reclaimed timber or shuttering, pick a tool with a proper nail slot and hooked end. If the nails are buried deep or bent over, you want a bar profile that can get underneath without chewing up half the board first.
Who Uses These on Site?
- Chippies use Stanley demolition tools for strip-out work, lifting old floorboards, easing off mouldings and pulling nailed sections apart before first fix starts again.
- Brickies and general builders keep a Stanley bolster or Stanley cold chisel handy for trimming masonry, knocking back snags and cleaning up edges where power tools are overkill.
- Roofers and fitters reach for a Stanley pry bar or Stanley wrecking bar when battens, boards or fixed sections need shifting without chewing up the surrounding work.
- Maintenance teams and refurb crews swear by this sort of kit for day-to-day rip-out jobs because it is quick to grab, does not need power, and gets into places a larger machine will not.
- Labourers and site teams use Stanley crowbar and nail puller tools for breaking down pallets, clearing waste timber and pulling fixings during clean-up and handover prep.
Accessories That Make Demolition Work Safer and Cleaner
A few simple add-ons save a lot of grief when you are striking, prising and clearing up on site.
1. Safety Glasses
Get these on before you start with a Stanley cold chisel or bolster. One flying chip from brick, mortar or a mushroomed striking head is all it takes to ruin your day.
2. Work Gloves
Good gloves help when you are hauling on a Stanley wrecking bar or pulling jagged timber and nails out of a rip-out pile. They will not stop everything, but they do save your hands from splinters, sharp edges and constant rubbing.
3. Lump Hammer
If you are using a Stanley bolster or cold chisel, pair it with the right hammer so you get a clean strike and proper control. Using the wrong hammer just glances off, damages the head and slows the whole job down.
4. Rubble Bags or Buckets
Demolition gets messy fast, so have something ready for brick chips, broken plaster and pulled fixings. It stops you kicking debris round the room and makes clean-up far less of a slog.
Choose the Right Stanley Demolition Tools for the Job
Use this quick guide to pick the tool that matches the strip-out work in front of you.
| Your Job | Category or Type | Key Features |
|---|---|---|
| Lifting floorboards and pulling nailed timber | Stanley wrecking bar | Longer reach, strong leverage, nail pulling slots, better for rough strip-out |
| Easing trim, boards or fixed sections apart neatly | Stanley pry bar | Slimmer profile, easier access behind materials, more control in tighter spaces |
| Breaking back plaster and trimming brick edges | Stanley bolster | Broad cutting edge, solid striking head, suited to masonry and plaster removal |
| Cutting narrow channels or knocking off precise sections | Stanley cold chisel | Narrower blade, more accurate striking point, useful for detailed masonry or metal work |
| Pulling exposed nails from reclaimed boards or pallets | Stanley nail puller | Hooked end, focused pulling action, less damage to reusable timber |
Common Buying and Usage Mistakes
- Buying the longest bar for every job sounds sensible, but it is a pain in tight areas and can damage finished surfaces. Keep shorter pry bars for controlled work and longer bars for proper leverage.
- Using a cold chisel or bolster with a mushroomed striking head is asking for trouble because steel can chip off when hit. Dress the head back safely or replace the tool before using it again.
- Treating a pry bar like a breaker usually ends with bent tools or wrecked materials. Use prying tools for lifting and separating, and switch to the right masonry tool when you need to strike and cut.
- Skipping eye protection during demolition work is one of the daftest mistakes on site. Brick chips, plaster fragments and metal splinters travel fast, so wear proper safety glasses from the start.
- Pulling nails at the wrong angle wastes effort and chews up the timber. Get the claw or slot properly under the fixing, use steady leverage, and block under the bar if you need a cleaner lift.
Wrecking Bars vs Pry Bars vs Bolsters
Stanley Wrecking Bar
Best for heavier strip-out, nailed timber and rough leverage jobs where force matters more than finesse. Buy this when the job is tearing out, lifting up and pulling free, not delicate removal.
Stanley Pry Bar
Better for controlled separation and getting behind trims, boards and fixed sections without opening everything up. It gives you more feel than a wrecking bar, but it is not the first choice for brute force rip-out.
Stanley Bolster
This is the one for striking and cutting through plaster, mortar and brick edges rather than prising. If you need to remove wider masonry sections by hand, a bolster is the right tool, not a bar.
Stanley Cold Chisel
Go for a cold chisel when the cut needs to be narrower or more precise, especially on metal or detailed masonry work. It is slower than a broad bolster for wide removal, but far cleaner where accuracy matters.
Maintenance and Care
Clean Off Grit and Moisture
Wipe bars, chisels and bolsters down after use, especially after masonry work or wet site conditions. Leaving plaster dust, mortar and water on the steel just invites rust and rough edges.
Check Striking Heads Regularly
If a cold chisel or bolster head starts mushrooming, stop using it until it is dressed back safely. Once the edge rolls over, chips can break off under impact and that is a needless risk.
Keep Edges Serviceable
A bolster or chisel does not need to be razor sharp, but it does need a clean working edge. If it is badly rounded over, it will bounce, crush material instead of cutting, and make the job harder than it should be.
Store Them Dry and Separated
Do not just leave demolition tools rolling round in the back of the van under wet rubble and fixings. A dry box or rack stops rust, protects the edges and makes it easier to grab the right tool straight away.
Replace Bent or Cracked Tools
A slightly worn bar is normal, but a bent pry bar or cracked striking tool is done. Once the steel has gone, it will not improve on the next job, and forcing it usually ends with damage or injury.
Why Shop for Stanley Demolition Tools at ITS?
Whether you need a Stanley wrecking bar for heavy strip-out, a Stanley cold chisel for tidy knock-through work, or a full spread of Stanley construction tools for the van, we stock the proper range. It is all in our own warehouse, ready for next day delivery, so you can get the right tool on site without hanging about.
Stanley Demolition Tools FAQs
What demolition tools does Stanley make?
Stanley makes the core hand tools most trades use for strip-out and construction work, including wrecking bars, pry bars, crowbars, bolsters, cold chisels and nail pullers. It is the sort of range you buy when you need solid hand tools for pulling apart timber, trimming masonry and shifting stubborn fixings.
What is the difference between a wrecking bar and a pry bar?
A wrecking bar is usually built for heavier leverage, rougher strip-out and pulling larger nailed sections apart. A pry bar is often slimmer and better for controlled lifting or getting behind trims and boards where you want access and feel rather than just brute force.
Should you wear eye protection when using a cold chisel?
Yes, without question. Cold chisels can throw off chips from the workpiece or the tool itself, especially if the striking head is worn. Proper eye protection is basic kit here and not something to skip for a quick job.
What length demolition bar is most useful?
It depends on the work, but mid to longer bars are usually the most useful on site because they give enough leverage for flooring, nailed timber and general strip-out without feeling too clumsy. Shorter bars still matter for tighter spaces, so plenty of trades keep more than one length in the van.
How do you safely dress a mushroomed chisel head?
Dress it back by grinding off the mushroomed edge carefully and evenly, following safe workshop practice and wearing eye protection. If the head is badly damaged, cracked or you are not set up to do it properly, bin it and replace the tool. It is not worth risking a chip of steel flying off on site.
Will a Stanley wrecking bar handle proper site abuse?
Yes, for the jobs it is made for. It will cope with repeated prising, lifting and nail pulling on normal strip-out work, but it is still worth using the right bar for the right task. Using one as a substitute breaker or striking tool all day is the fast way to ruin it.